I have three all-time favorite desserts: brownies, tiramisu, and pancakes. And while pancakes are perfect for lazy weekend mornings, I think it would be a crime to hide fudgy brownies or silky tiramisu inside one. So today, pancakes are off the table and we’re focusing on a mash-up that makes perfect sense: Tiramisu Brownies.
Here’s the twist: I don’t actually enjoy drinking coffee. I know, shocking for a tiramisu lover! In fact, when I make traditional tiramisu, I swap the espresso for hot cocoa. But when it comes to brownies, coffee is the secret ingredient that deepens the chocolate flavor. Even if you’re not a coffee drinker, trust me — you won’t taste “coffee,” only a richer, more decadent chocolate. So don’t skip it.
And of course, the heart of tiramisu is mascarpone. That dreamy, creamy Italian cheese is what makes this dessert truly irresistible. By the way, it’s pronounced mas-car-po-ne, with a soft “e” at the end.

Ingredients & Substitutions
What makes tiramisu brownies special is the perfect balance of chocolate, coffee, and cream. Let’s break it down:
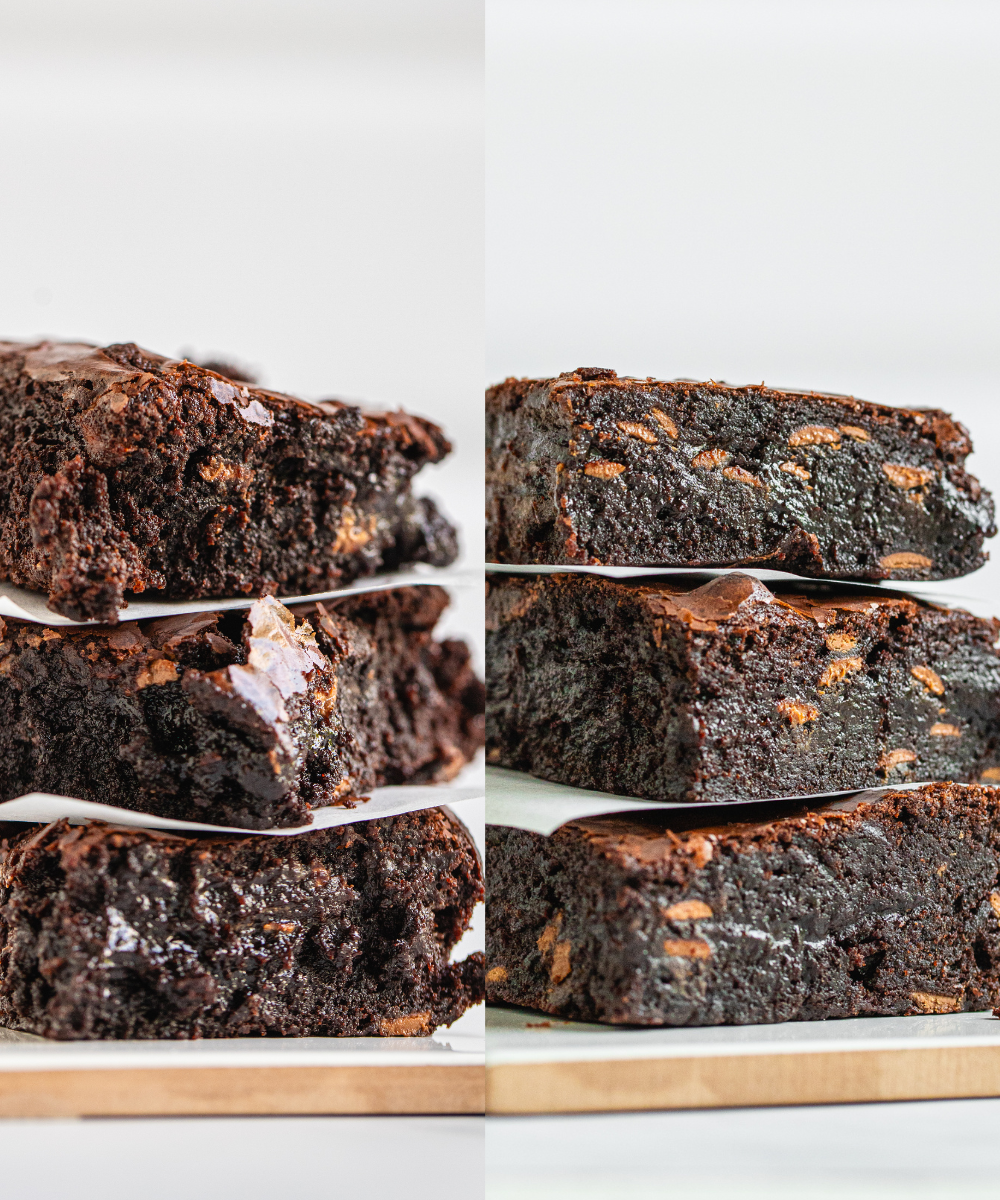
- Dark Chocolate (70% or higher): This gives your brownie base that deep, fudgy flavor. Milk chocolate will make it too sweet, so stick to dark.
- Butter: Unsalted butter is best for controlling salt levels.
- Sugar: Classic white sugar works here, but you can replace part with brown sugar for extra chewiness.
- Eggs: Room-temperature eggs whip up better and make the batter glossy.
- Flour & Cocoa Powder: A small amount of flour keeps the brownie dense, while cocoa boosts the chocolate flavor.
- Espresso: The magic touch. Strong brewed espresso or espresso powder intensifies the chocolate. Use decaf if you prefer, or hot cocoa for a kid-friendly version.
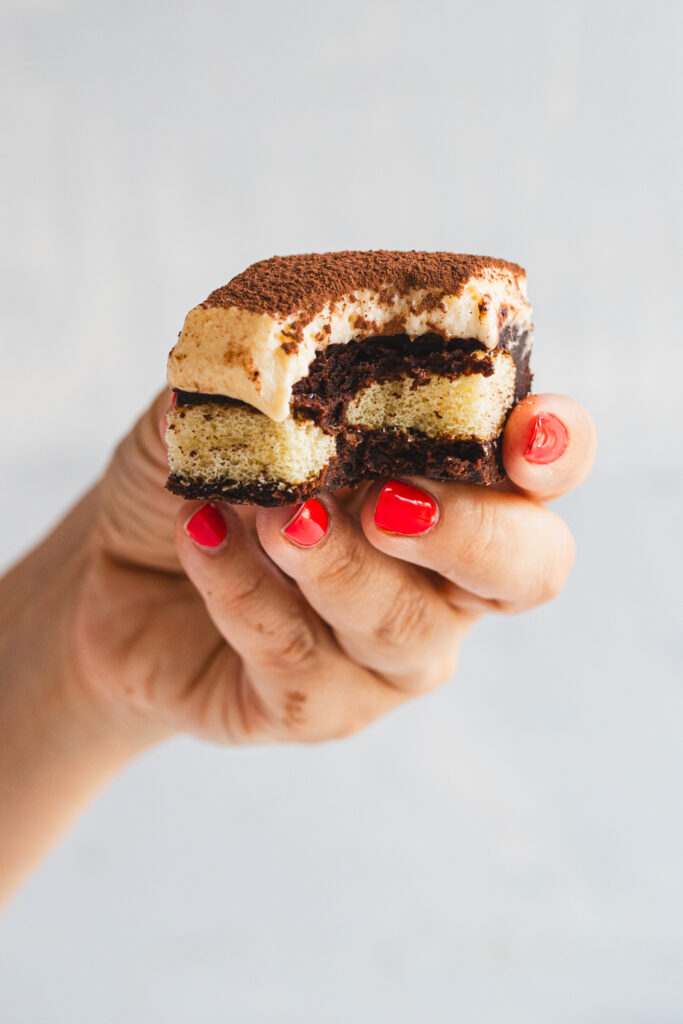
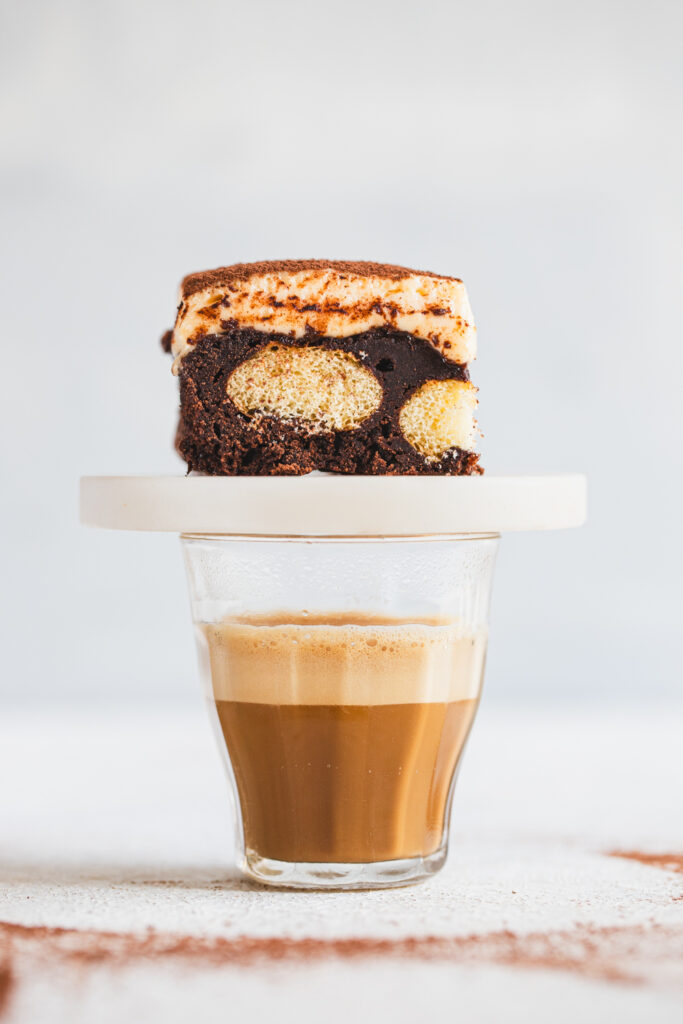
- Ladyfingers: You can press the ladyfingers into the brownie batter before baking, just like I did — it adds extra texture and makes the dessert really visually striking. You can also layer the ladyfingers in the cream, as in classic tiramisu. Or, you can skip them entirely — I’ve tried it this way too, and it’s still delicious and photogenic, see below!!
- Mascarpone: The creamy star of the tiramisu layer. If you can’t find it, substitute with cream cheese or ricotta — though the flavor will differ.
- Powdered Sugar & Eggs (for the cream): Light, fluffy, and perfectly sweetened.
How to Make Tiramisu Brownies
Melt & Mix: Melt chocolate and butter until smooth. Stir in sugar, vanilla, and espresso. Add eggs one at a time.
Dry Ingredients: Sift in flour, cocoa, and salt. Mix gently — don’t overbeat.
Bake: Spread into a lined pan, press in ladyfingers if using, and bake until just set (about 25 minutes). Cool completely.
Make the Cream: Whisk yolks with sugar, fold in mascarpone. In another bowl, whip whites with sugar, then gently fold into the cream.
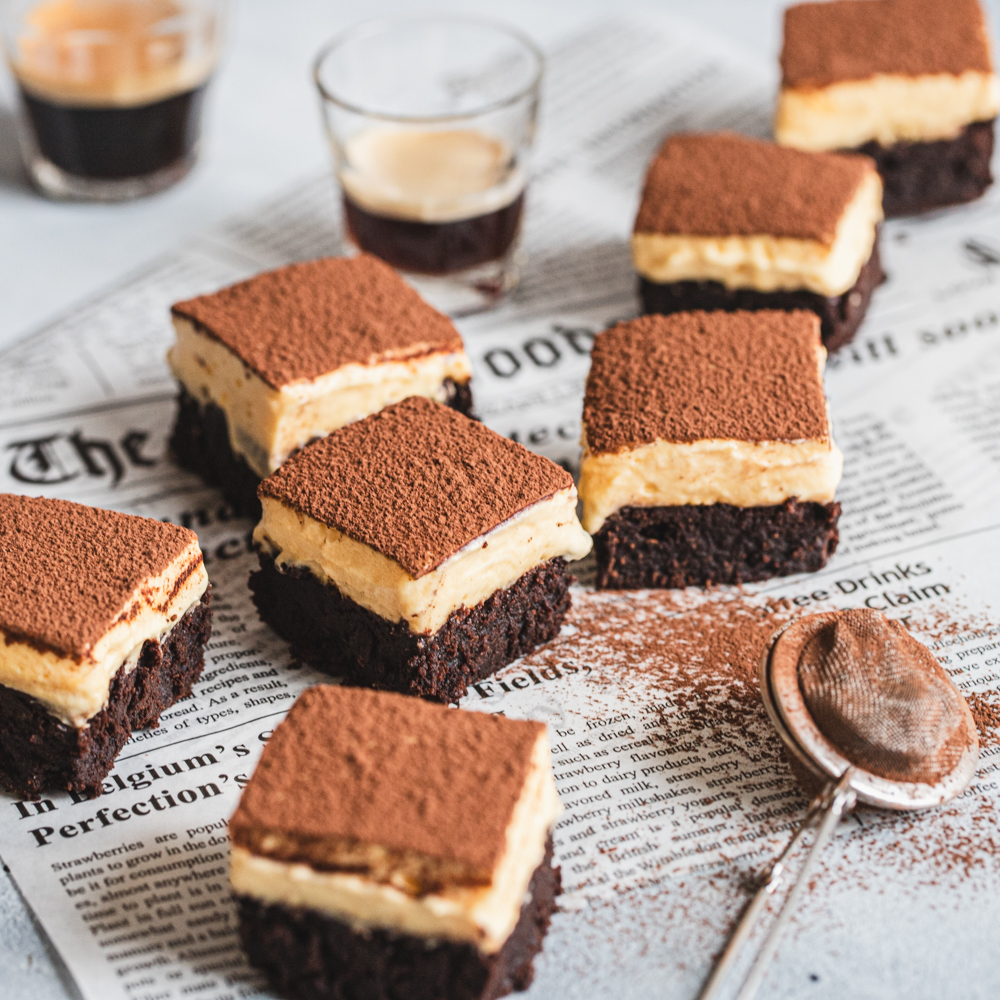
Assemble: Spread cream over cooled brownies, chill for at least 4 hours (overnight is best). Dust with cocoa before serving.

Common Questions About Tiramisu Brownies
Can I make them without mascarpone?
Yes, cream cheese or ricotta works, but mascarpone gives that authentic silky texture.
Can I skip the coffee?
You can, but even non-coffee drinkers love the flavor depth it adds. Use decaf if needed.
What about alcohol?
Classic tiramisu sometimes includes Kahlúa, amaretto, or marsala. It’s optional here. Add a splash for grown-up flair or skip for family-friendly brownies.
My brownies came out dry. What went wrong?
Most likely, overbaking. Brownies should be slightly soft in the center. Metal pans also bake more evenly than glass.
How do I keep ladyfingers from getting soggy?
Dip them very briefly in coffee — a quick dunk, not a soak.
My mascarpone cream is runny.
Some mascarpone brands are watery. Drain excess liquid, or stir in a bit of gelatin for stability.
Can I make tiramisu brownies gluten-free?
Yes! Swap the flour for a 1:1 gluten-free blend and use gluten-free ladyfingers (or skip them entirely).
Can I make tiramisu brownies from a store-bought brownie mix?
Absolutely! You can use a high-quality boxed brownie mix for the base — just follow the package instructions, then press in ladyfingers if you like and top with the mascarpone cream. Keep in mind that while it’s quicker, using real chocolate will give you a deeper, richer flavor.
Storage & Make-Ahead Tips
Make ahead: Brownie base can be baked a day early. The cream sets best after chilling overnight.
Fridge storage: Store covered in the fridge for up to 3–4 days.
Freezer: Freeze just the brownie base (without cream). Thaw, then top with fresh mascarpone cream before serving.

Serving Ideas
Dust with cocoa powder right before serving for a clean, dramatic look.
Add chocolate shavings, cocoa nibs, or even a dusting of powdered sugar for variety.
Serve with fresh strawberries or raspberries to cut through the richness.
For a dinner party, pair with a small glass of amaretto or a scoop of vanilla gelato.

Photography Tips
Tiramisu brownies are photogenic!
- Use a sharp knife and wipe clean between slices.
- Dust cocoa just before shooting — otherwise it clumps.
- Capture the action of cocoa falling onto the brownies.
- Don’t stack slices — the cream is too soft. Style single pieces on plates or in hand.
- Use side lighting to show off the fudgy base and creamy topping.
Whether you’re a tiramisu fan, a brownie lover, or just searching for the next viral dessert, Tiramisu Brownies deliver everything: fudgy chocolate, creamy mascarpone, a hint of coffee, and guaranteed smiles.

Tiramisu Brownie
Ingredients
Method
- Melt the chocolate and butter together over a double boiler or in the microwave until smooth.
- Stir in the sugar, vanilla, and espresso.
- Beat in the eggs one at a time.
- Sift in the flour, cocoa powder, and salt. Gently fold until just combined.
- Pour the batter into a parchment-lined 8×8 inch baking pan.
- Press the ladyfingers lightly into the batter, then smooth the top.
- Bake at 350°F (175°C) for 20–25 minutes, until the center is just slightly fudgy. Let cool completely.
- Beat the egg yolks with half of the powdered sugar until pale and creamy. Fold in the mascarpone.
- In a separate bowl, whip the egg whites with the remaining powdered sugar until stiff peaks form.
- Gently fold the whipped whites into the mascarpone mixture.
- Spread the tiramisu cream evenly over the cooled brownie base.
- Chill for at least 4 hours (ideally overnight) to allow the flavors to meld and the cream to set.
- Just before serving or photographing, dust generously with cocoa powder.